Set your survey's title and cover
The Welcome section is the first screen in the Editor tab. It holds the survey's title and everything on its cover — the screen a respondent sees before they answer anything.
Steps
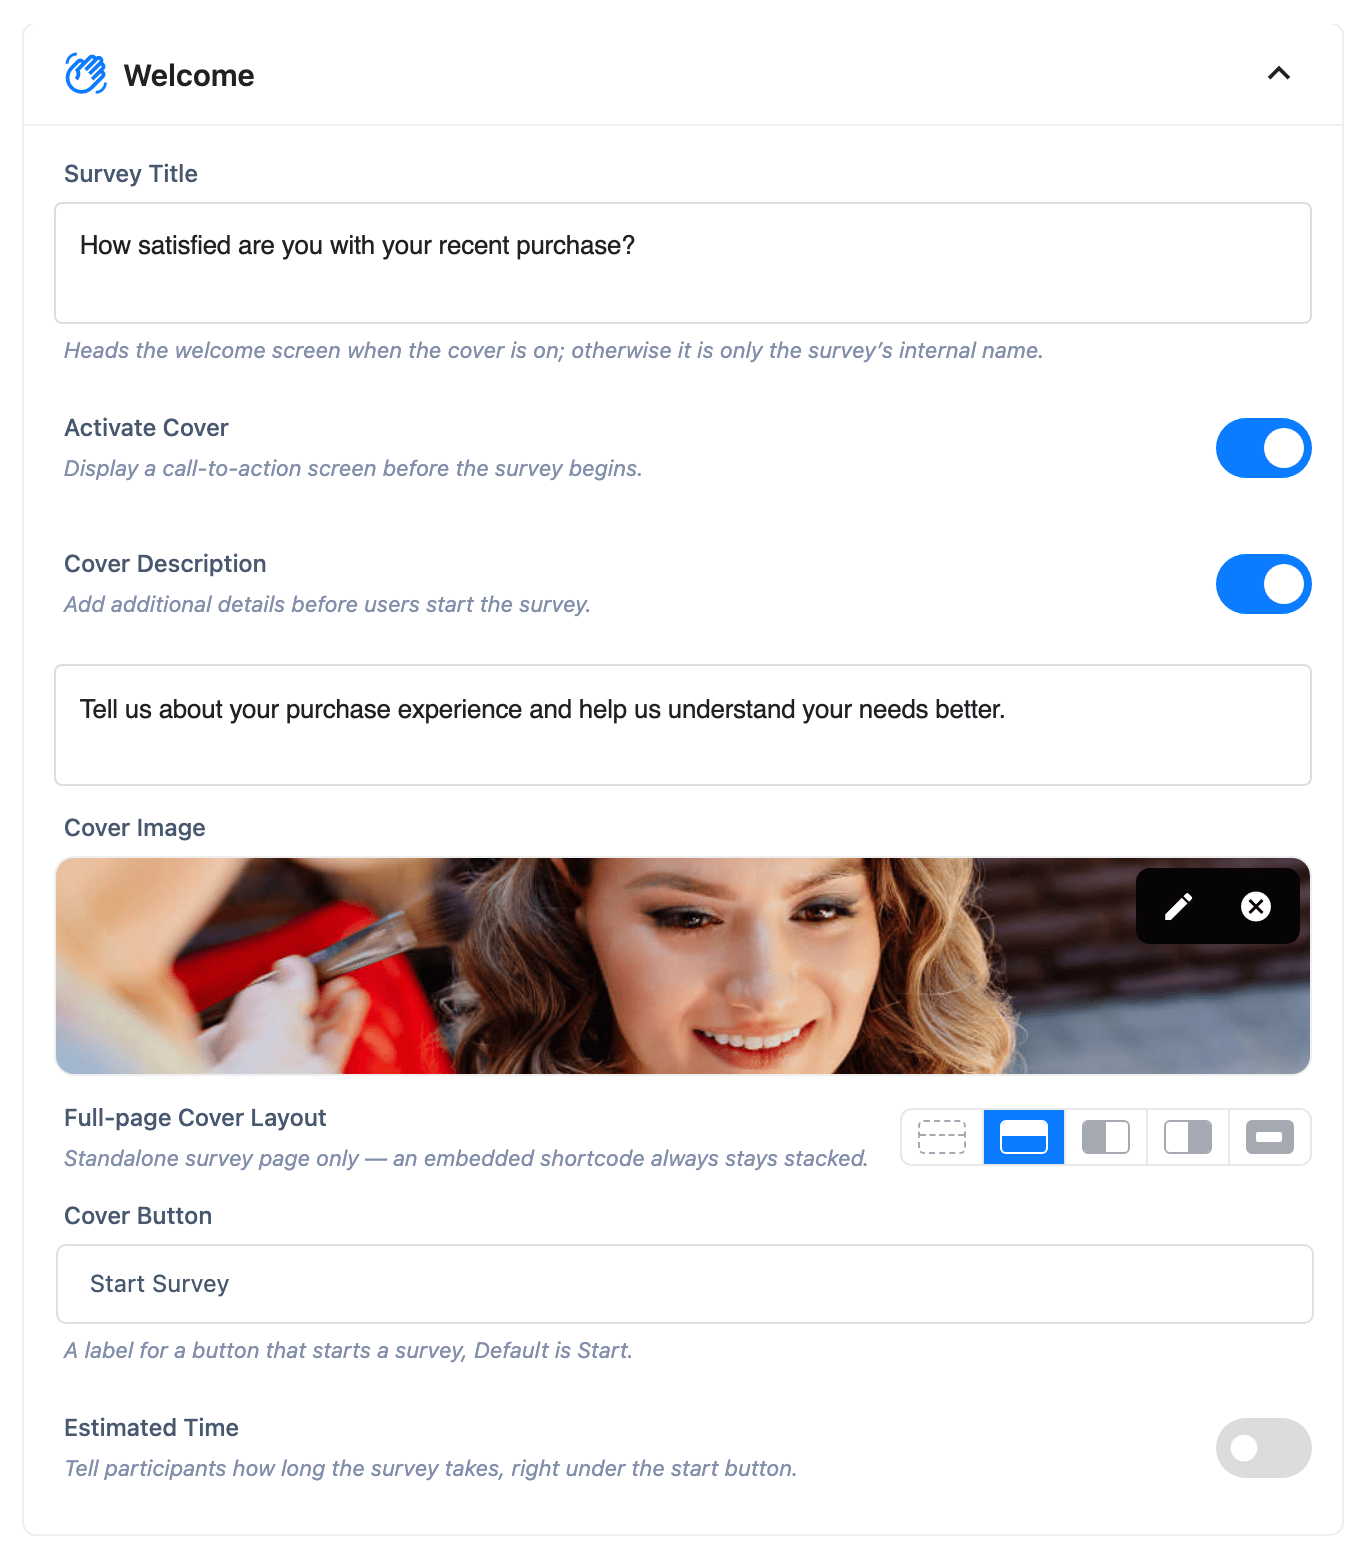
- Open a survey's Editor tab. Welcome is the first section in the left-hand nav.
- Type the survey's title into the title field. This is required — the survey will not save without it. The title field is rich text, so you can bold, italicise, underline or link parts of it.
- Under Cover Layout, pick a layout. A new survey starts on Default, which follows your site-wide default cover layout (see Display options) until you override it here. Pick Stacked, Image left, Image right, or Full screen to lock this survey to that layout instead. All five choices are available on both free and Pro.
- Add a cover image from the WordPress media library, if you want one.
- Turn on the cover description toggle to add a second block of rich text below the title, then write it.
- Edit the Start button's label if you don't want the default text.
- Set Estimated Time: a number from 1 to 999, plus a unit of seconds or minutes. If you leave it unset, it falls back to 30.
Settings reference
| Field | What it does | Default | Free/Pro | Limits |
|---|---|---|---|---|
| Survey title | Rich text; required to save | — | Both | Links, bold, italic, underline and lists survive; other markup is stripped |
| Cover layout | Default, Stacked, Image left, Image right, or Full screen | Default (follows the site-wide setting) | Both, no lock | 5 options |
| Cover image | From the WordPress media library | None | Both | — |
| Cover description | A second rich-text block below the title | Hidden until turned on | Both | Same rich-text whitelist as the title |
| Start button label | Text shown on the button that opens the survey | — | Both | — |
| Estimated time | Number + unit (seconds or minutes), shown to respondents as "Takes N sec/min" | 30 | Both | 1–999 |
Rich text on this screen goes through the same filter everywhere in the plugin: links, bold, italic, underline, lists and spans survive when you save; anything else — images pasted into the text, tables, headings — is stripped silently. If formatting you added disappears after saving, this is why.
About the cover layouts
Default doesn't set a layout of its own — it defers to your site's default cover layout (Settings → Appearance, Stacked unless you've changed it). The other four choices lock this survey's layout regardless of that site-wide setting:
- Stacked — title, description and button centred, image (if any) above them. This is the
site-wide default unless changed, and the only layout an embedded
[surveyx]shortcode ever shows. - Image left / Image right — the cover image fills one half of the screen edge to edge; the title, description and button sit in the other half, named by which side the image is on.
- Full screen — the cover image becomes a full-bleed backdrop behind the stacked content. This is a cover layout only — it has nothing to do with the removed "Full Screen" theme container.
An embedded survey (the [surveyx] shortcode) always renders the stacked cover, whatever layout
you picked. Image left, Image right and Full screen are only visible on a survey's own page.
If a cover image fails to load, the image half of the layout is dropped and the cover falls back to showing content only — your saved layout choice doesn't change.
What respondents see
- A respondent visiting the survey's own page sees the layout you chose; a respondent on a page where you embedded the survey with the shortcode always sees the stacked layout.
- The estimated time appears as a line reading "Takes N sec/min", using the number and unit you set.
- The button they click to begin uses the label you set for it.